Everyday, billions of people are taking advantage of the power of social media to keep up with friends, coworkers, brands, news, you name it.
And with approximately 850 million users, there is only one name when it comes to professional social networking. The power of LinkedIn lies in the ability to directly connect with your target audience, build relationships, and put your unique voice, and your unique selling points in front of them.
However, not enough people leverage this network.
- It’s hard to know what to talk about
- It’s hard to know what the right strategy is
- It’s hard to make content creation routine
- It’s easy to give up after not seeing immediate results
In this article, we’ll cover how to use LinkedIn Rocket Mode to get you in front of your target audience, and create your next post in no time 🚀
Step 1: Enter Brief
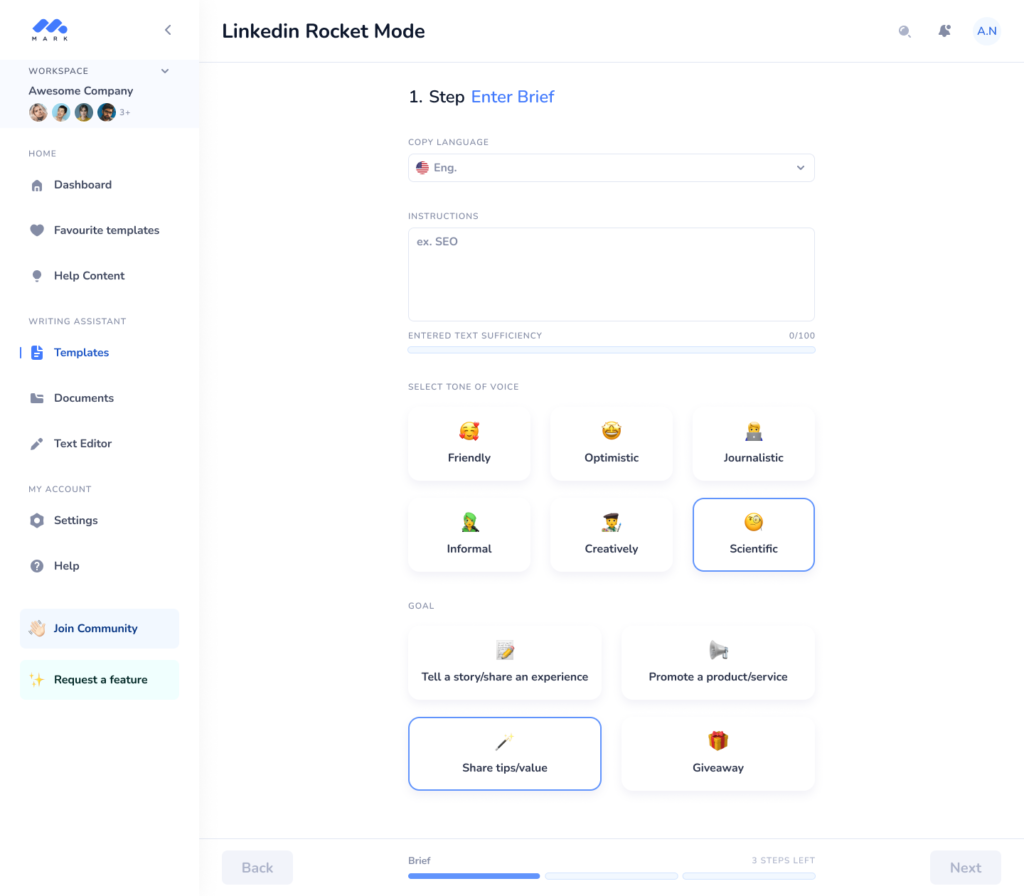
This is where we set the foundations of our post. What are we going to write about? What style are we going to write it in? What tone of voice are we going to use? All of these important decisions.
To start, take your idea/brief, and throw it in the instruction box.
To help guide the AI in the right direction:
- Add more instructions if you can
- Add your opinion
- Write like you would write a friend, not a search engine.
We have written a few articles about text input best practices, and kickstarting post ideas that might be useful to you as well 🚀
The tone of voice here is going to set the overall tone of the post from start to finish. You can of course tweak the tone once we get to the review stage as well 😊
Inserting the goal of your post, helps guide the AI towards your desired outcome.
For example a giveaway is likely to end with a call to action, whereas sharing tips/value is more of a thought leadership piece. Both will read slightly differently.

Step 2: Keep em hooked!
You have between 1.7 seconds (on mobile) and 2.5 seconds (on desktop) to get your audiences’ attention.
So it’s important to hook them early, before the line break.
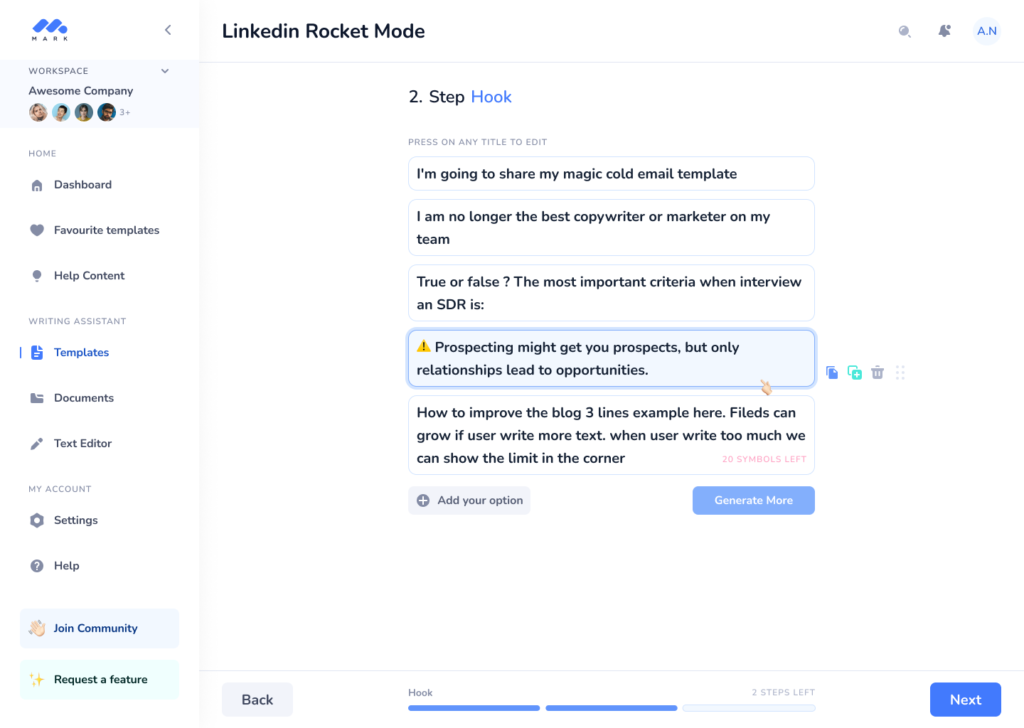
Taking the instructions, tone, and goal of your LinkedIn post for Step 1, Mark will start to generate ideas for your hook – ready for you to edit, rewrite, or generate more hook examples, as needed.
This hook is going to form the first sentence(s) of your post, above the line break.
Remember if the outputs aren’t exactly what you are looking for, try adjusting your text from Step 1, or generating more examples.

Step 3: Preview and post!
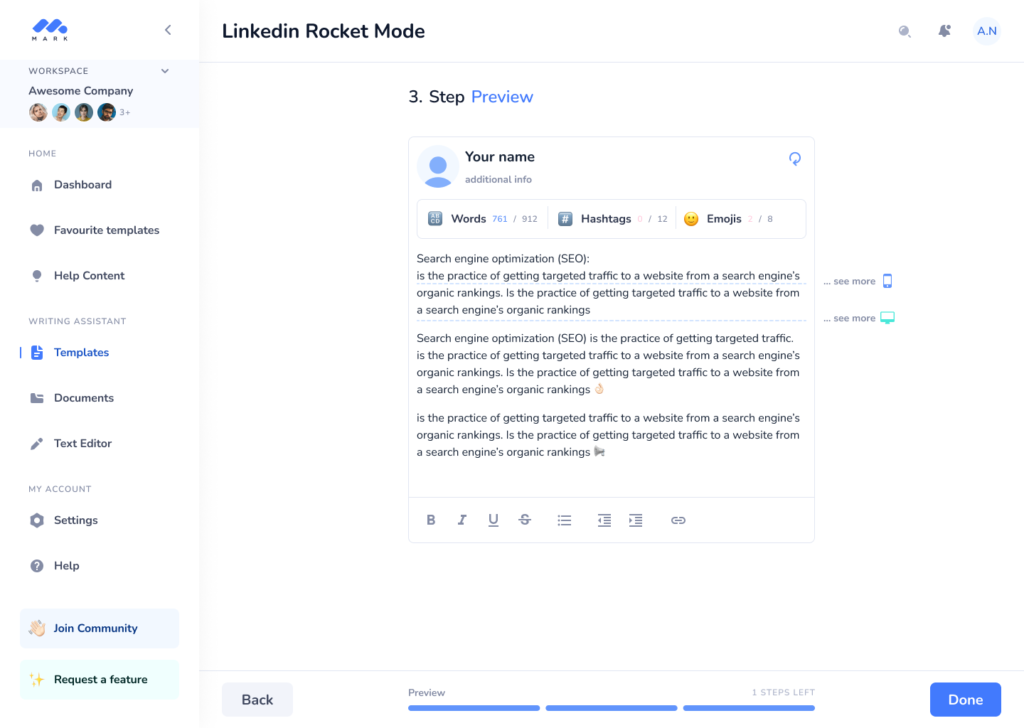
Taking the information from Step 1, and the all important hook from Step 2, Mark will start generating the rest of your post.
Now we’re ready to perfect it!
Remember, if the first drafts aren’t quite right: don’t hesitate to regenerate by using the regenerate button in the top right hand corner. This regeneration will not alter your hook, so no need to worry there 😉
You’ll also notice a word, hashtag, and emoji counter sitting above your generated text. These counters are intended as guidelines, based on LinkedIn algorithms and best practices.
On the right hand side you’ll see the “see more” line breaks*. A viewer seeing your post will see up to this line, so be sure your hook is compelling enough for them to click to see the rest of your post.

*note: the line breaks are different for mobile and desktop users, so be sure to keep both in mind when perfecting your hook.
And you’re set!! 🎉
This is how we can create a first draft in no time – leaving you as the subject matter expert to decide what to leave in and what to remove, and add your (or your companies) point of view.
Adding your own unique perspective, references, and tweaking the content to match your tone of voice as you go 🚀
You’ll be creating your next post at no time!
Happy writing 🤖

0 comments